High Disk Usage has plagued Microsoft Windows users for years now. Regardless of Microsoft’s continuous upgrades to Windows in the form of Windows 8, Windows 8.1, and Windows 10, the issue still lurks in our PCs.
Whenever people talk about 100 percent disk usage in Windows 10, one process that manages to grab the attention is “wsappx.” The notorious process found in the task manager is one of the most significant factors responsible for high disk usage in Windows 10. Even after hundreds of complaints from Windows users, Microsoft is still mum about it.

So what is “Wsappx” and why does everyone seem to hate it? This is part of our ongoing series ofTask Manager processeswhich are likely to be responsible for high disk usage in Windows 10.
How To Disable Wsappx in Windows 10?
Currently, there are a number of ways to disable Wsappx, but it has been observed that different methods work for different users. Here I will provide you with two methods to disable Wsappx or the services under it —
1. Disable Windows Store
Disabling Windows Store will have many ramifications. Apart from not being able to use Windows Store, you may face bugs and lags in Windows Store Apps.
Moreover, disabling the Windows Store won’t disable the Wsappx service, only it will take a minimum load to perform Windows Store-related tasks, thus solving your problem of 100 percent high disk usage.

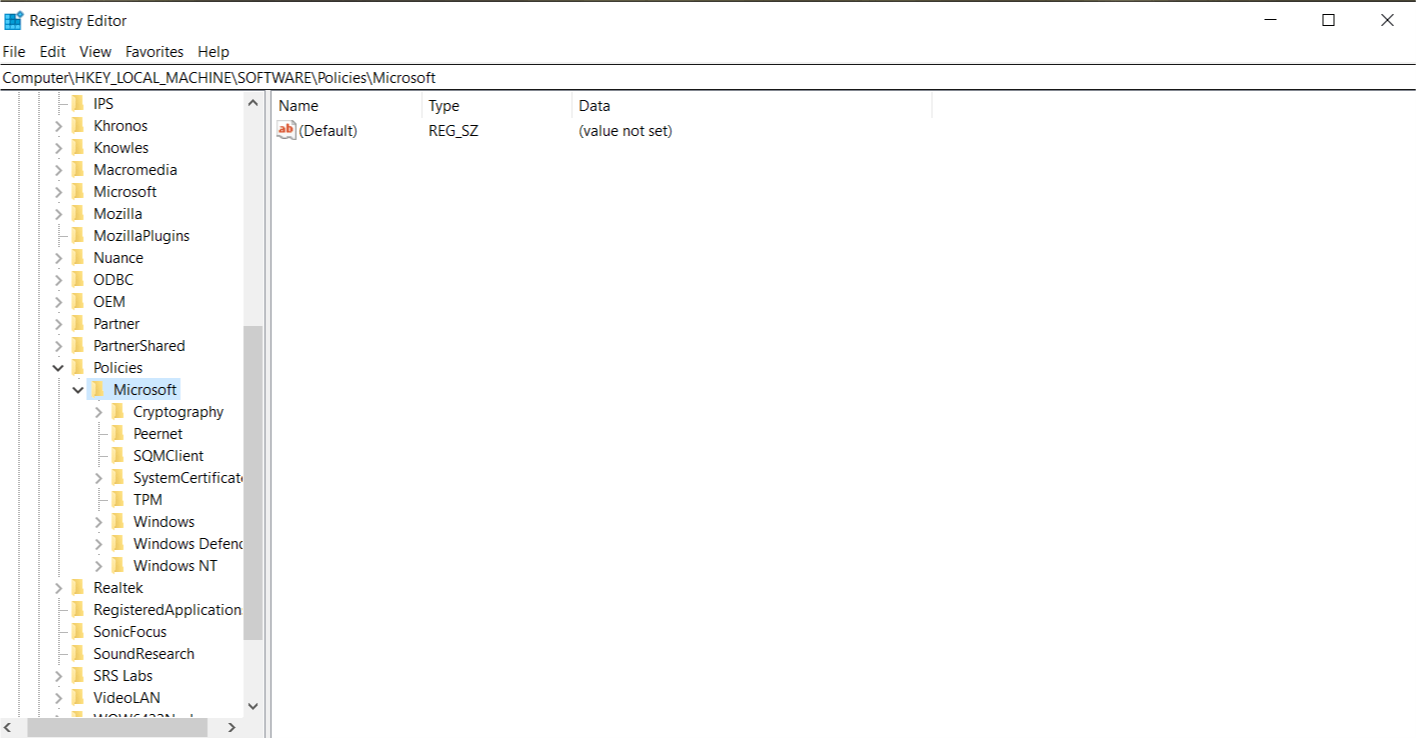
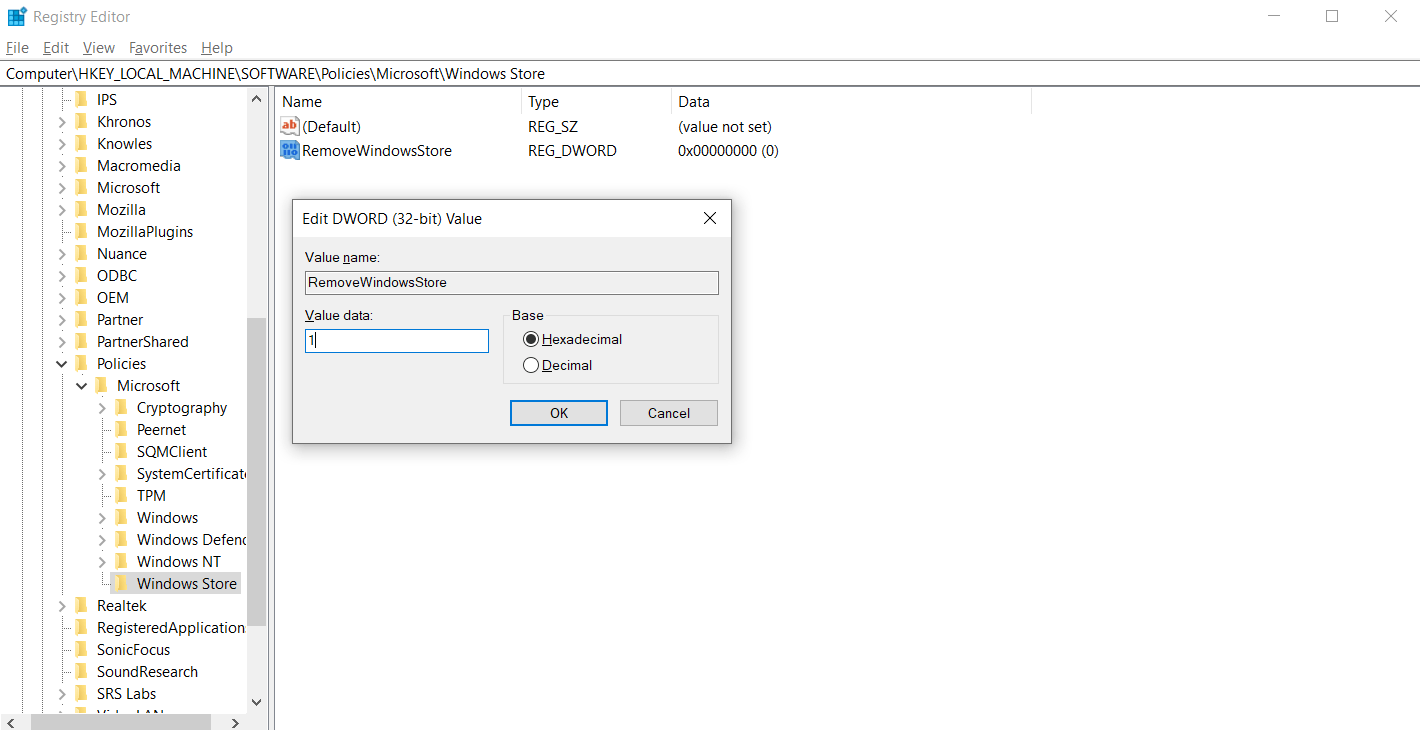
Disable Windows Store using Registry Editor
Disable Windows Store Using Group Policy Editor
you may also disable the Windows Store using the Local Group Policy Editor for Windows Pro and Enterprise users. Just navigate to Computer Configuration > Administrative Templates > Windows Components > Store.
Double-click on “Turn off the Store application” on the right Window panel > Choose Enabled > Click Apply. Restart your system.
2.Change the value of AppXSvc in Registry
3.Change the value of Clipsvc in Registry
4.Troubleshoot in Clean Boot State
Sometimes the problem could arise because of a particular program. To find out if this is the case, you can restart the system in Clean Boot State. Essentially, this action runs your system on the bare minimum startup programs and services — this can help you identify if a third-party program is the main culprit for 100% disk usage. To perform a clean boot, follow the steps below:
- In the ‘Services’ tab, check “Hide all Microsoft services” and click on “Disable all.”

- Now, click on ‘Apply’ or ‘OK’ and restart the system.
What is Wsappx in the task manager?
In layman’s terms, Wsappx is a process found under the Windows Task Manager and is responsible for handling Windows Store (Microsoft Store) applications for Windows 8/ Windows 10. That’ll include installing, uninstalling, and updating apps for your Windows platform.
Getting into little detail, Wsappx is basically divided into two separate background services, namely AppX Deployment Service (AppXSVC) and Client License Service (ClipSVC).
While AppX Deployment Service (AppXSVC) provides infrastructure support for deploying Store applications, Client License Service (ClipSVC) provides infrastructure support for the Microsoft Store (Service Defaults).
Generally, you will see Wsappx as the main culprit, taking up huge chunks of the disk. Sometimes it is out in the front in the Task Manager, however, other times it can be named under different processes as well. To check if it’s really Wsappx that is taking high disk usage in your system, follow these steps —
High Disk Usage Ultimate Solution
It is entirely possible that even if you disable Wssapx, your PC is still running slow. In that case, you’re able to head over to our100% disk usage guideto try other solutions.
Wsappx high disk usage FAQ
Windows Store apps like Paint 3D, Mail, People, etc., keep on updating themselves from time to time. It’s even possible that some operations get stuck for some underlying reason and Windows attempts to repeat the process in the next session, which explains 100 percent disk usage in Windows 10 upon booting the PC.
No, Wsappx and the underlying processes like AppXSVC and ClipSVC do not carry any viruses or malware. At least I have not encountered any red flags from my anti-virus. If you have any doubts, you’re able to just open the file location of the process. If the process is stored under the Windows 32 folder, then you are likely not dealing with a virus. You can always cross-check itwith an antivirus, via scanning the computer for any virus or malware.
Yes, you can end Wsappx in the task manager app by right-clicking on it and selecting ‘end process.’
No, you can’t disable a Wsappx background process. It initiates and terminates as per the requirement, on its own. For example, such a process might open in the background when installing or removing a program from your system.
There’s no way you may permanently disable it. At best, you can only end the process manually each time.
